Microsoft Sign-In & Admin Consent Guide
For Microsoft Entra ID / Azure AD administrators.
This guide walks through approving Cabos for organization-wide access via Microsoft Entra ID (formerly Azure AD). The steps below require an account with administrator privileges — Global Administrator, Cloud Application Administrator, Application Administrator, or Privileged Role Administrator.
For background on Microsoft's consent experience, see the official documentation.
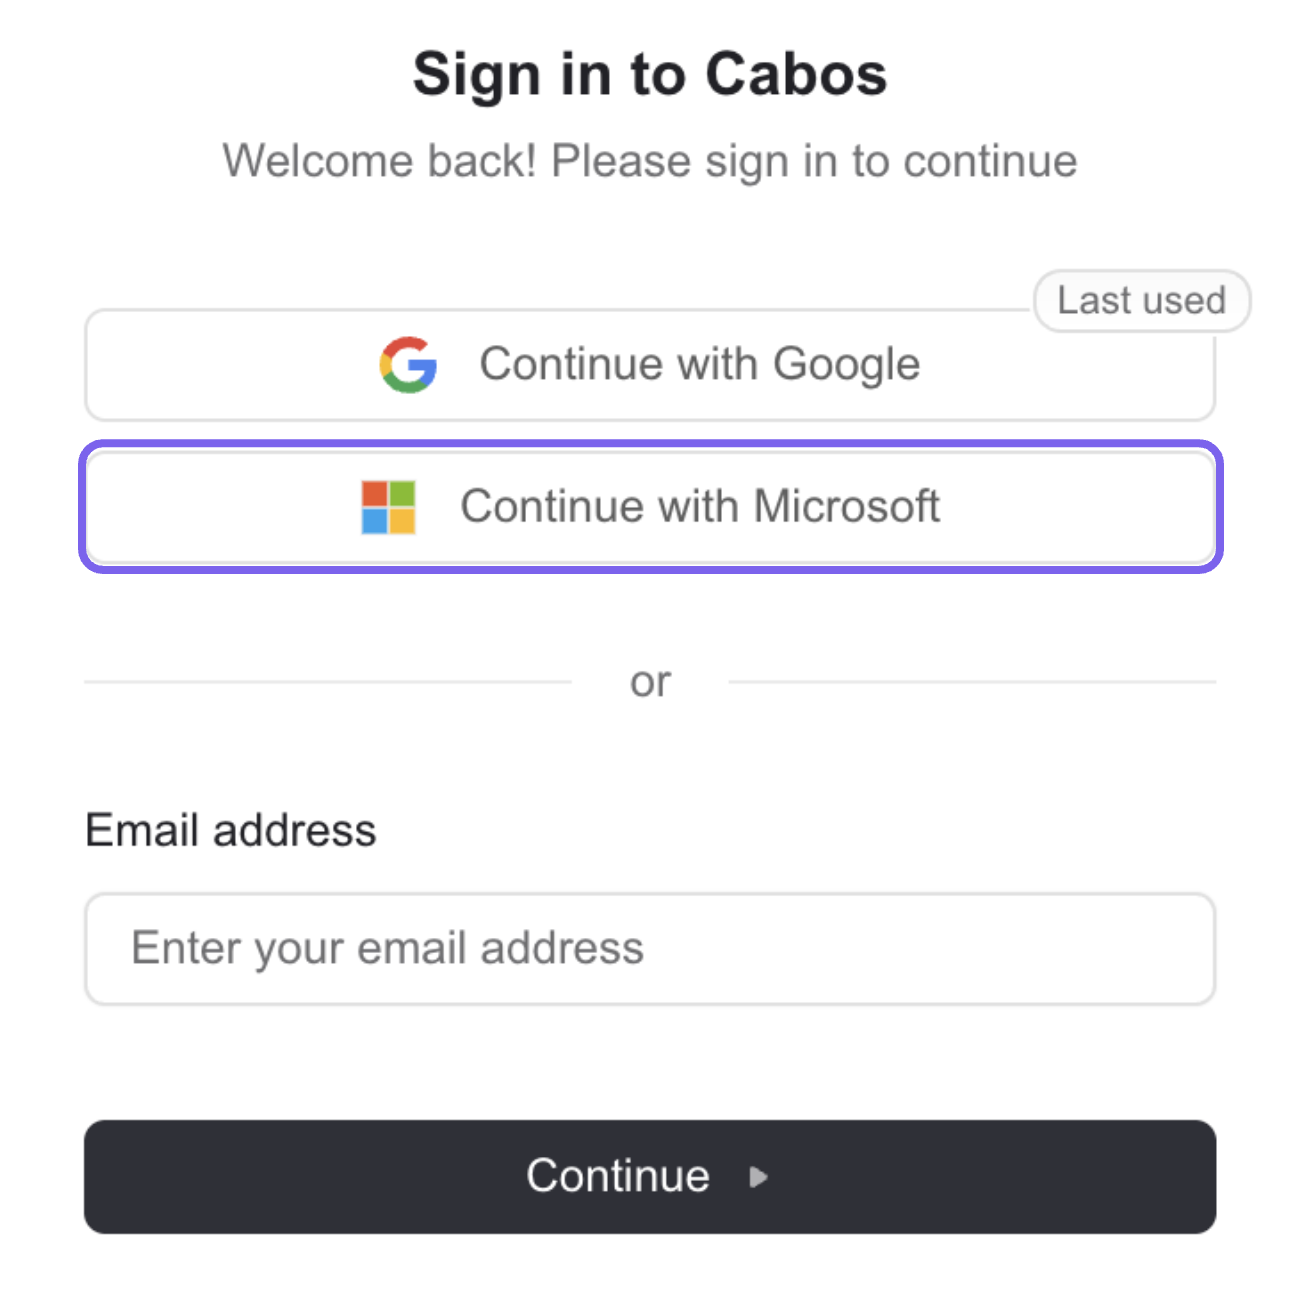
Step 1 — Sign in with Microsoft
On the Cabos sign-in page, click Continue with Microsoft. You'll be redirected to Microsoft's secure sign-in flow.
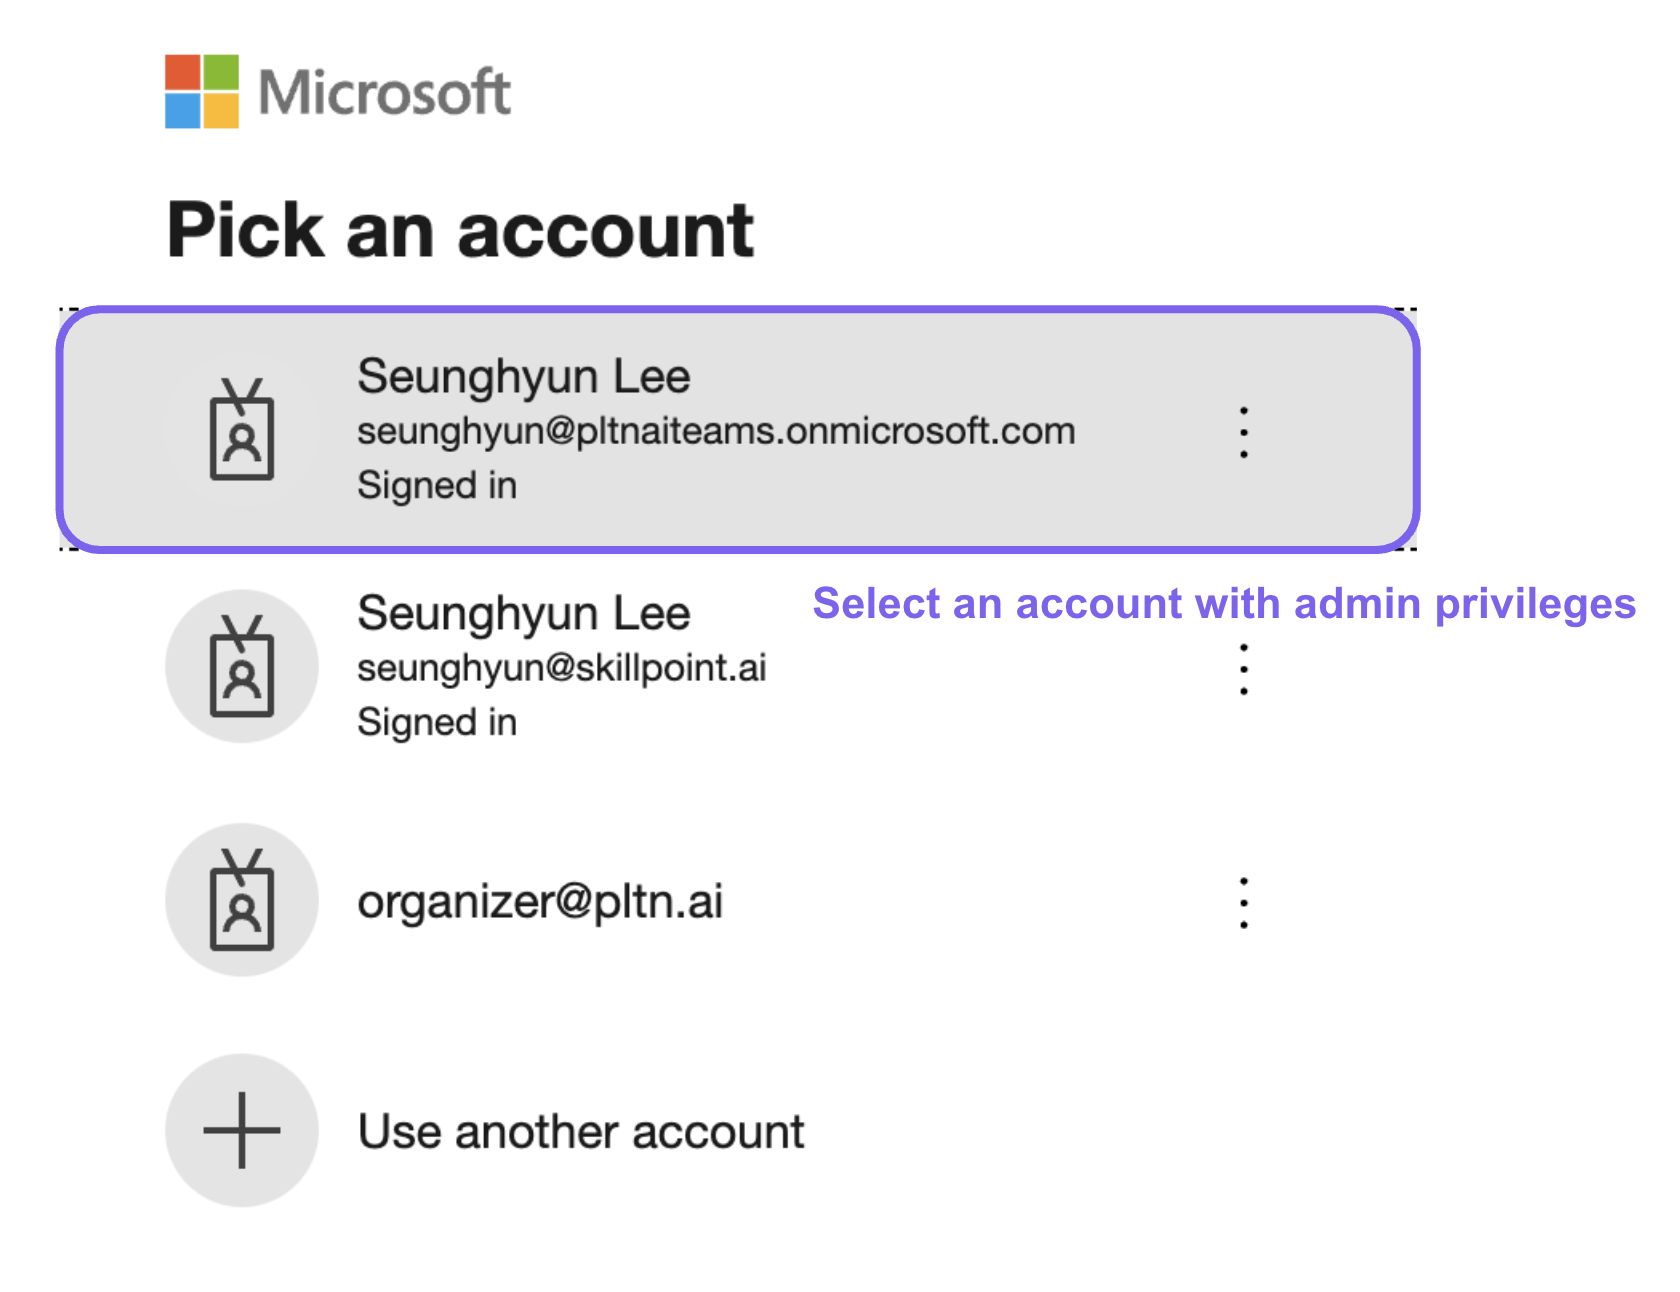
Step 2 — Pick your admin account
Sign in with your company-managed Microsoft account (e.g. name@company.com or name@company.onmicrosoft.com).
Make sure the account has admin privileges in your tenant — otherwise the consent checkbox won't appear in the next step.
Step 3 — Grant admin consent
After sign-in you'll land on the Permissions requested screen. Cabos requests:
- Sign in and read user profile
- Maintain access to data you have given it access to
Check the box labeled "Consent on behalf of your organization", then click Accept. This grants the permissions organization-wide, so individual users won't be prompted again.
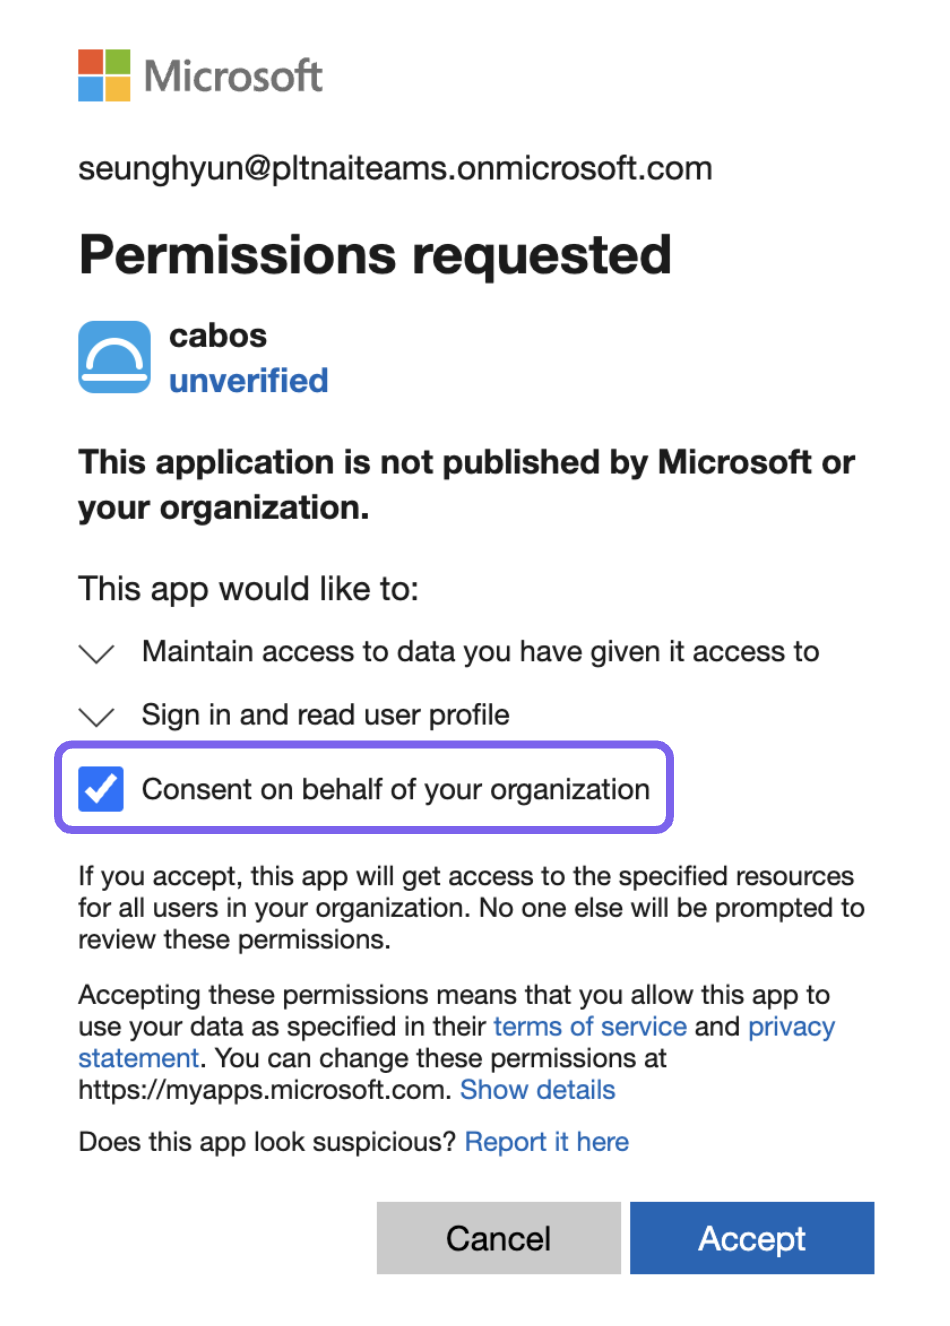
If the consent checkbox doesn't appear, the signed-in account doesn't have one of the required admin roles listed above.
Application status
You may see Cabos marked as Unverified — this only means the application isn't published by Microsoft itself. Cabos is a customer-deployed enterprise application approved through your organization's own Entra ID consent process.
Need help?
For additional security documentation — architecture overview, data handling, compliance details — contact the Cabos team.