Segments
A Segment is the core unit of sourcing in Cabos. It represents the candidate persona you're looking for — "former supply-chain directors at Amazon", "battery engineers at Tesla with 5+ years", etc.
Once a segment is created, Cabos collects matching profiles into candidate lists, evaluates them, and lets you send connection requests or InMails to the ones you pick.
Open this page from a project: Sourcing → Segments.
1. Create a segment
From the Segments page click New Segment. The form has three steps.
Step 1 — Name
- Segment Name — required. A short label like "Amazon supply-chain leaders" that you'll see across the project.
Step 2 — Interview & Screening
This is the configuration applied later when you reach out to candidates.
- Interview Duration — minutes per interview (default 60).
- Honorarium Rate — per-interview honorarium in your currency (default 100).
- Use a screener — toggle on to attach a screener question set that candidates answer before scheduling. You can pick from existing sets or create a new one inline.
Step 3 — Outreach
Outreach configuration is always required to create a segment, even if you don't want Cabos to send messages automatically.
- Auto-send outreach — when on, Cabos will automatically send the first message to qualified candidates as they enter the segment. When off, you review the candidate list and send manually.
- Outreach type — Connection Request or InMail.
- Template — pick from your Outreach Templates, or write the message inline.
- Subject (InMail only) — required for InMail.
- Message — the message body. Connection requests have a 300-character cap; InMails have a longer limit.
- Follow-up — optional. Send a second message a configurable number of days after the recipient accepts (or after the first send for InMail).
Click Create Segment to save. You land on the segment detail page.
2. Add a candidate list
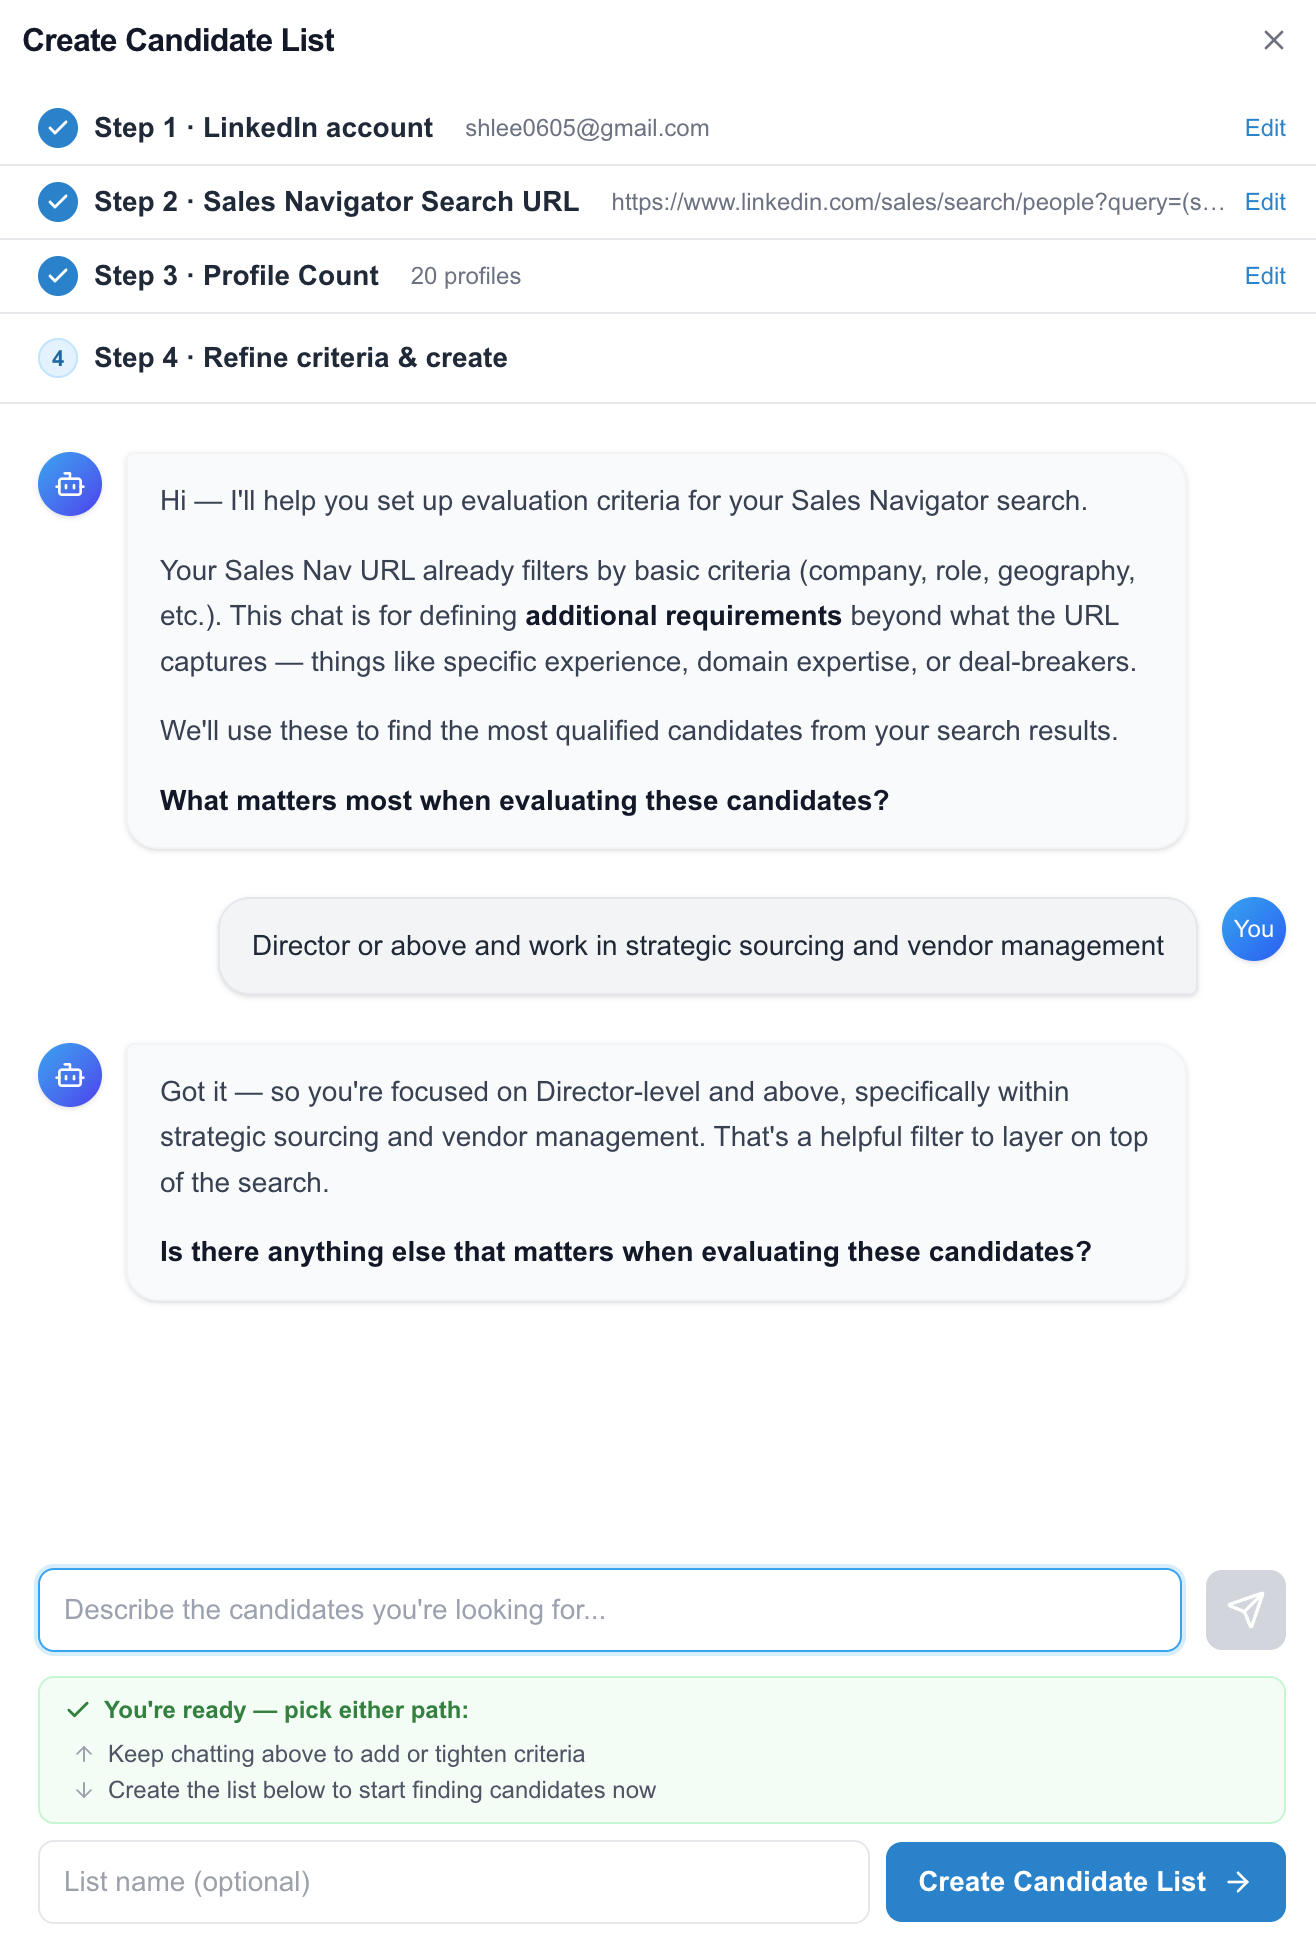
A new segment starts empty. To pull in candidates, click Add Candidate List on the segment detail page. The modal walks you through four steps:
-
LinkedIn account — pick the connected account Cabos should use to pull profiles.
-
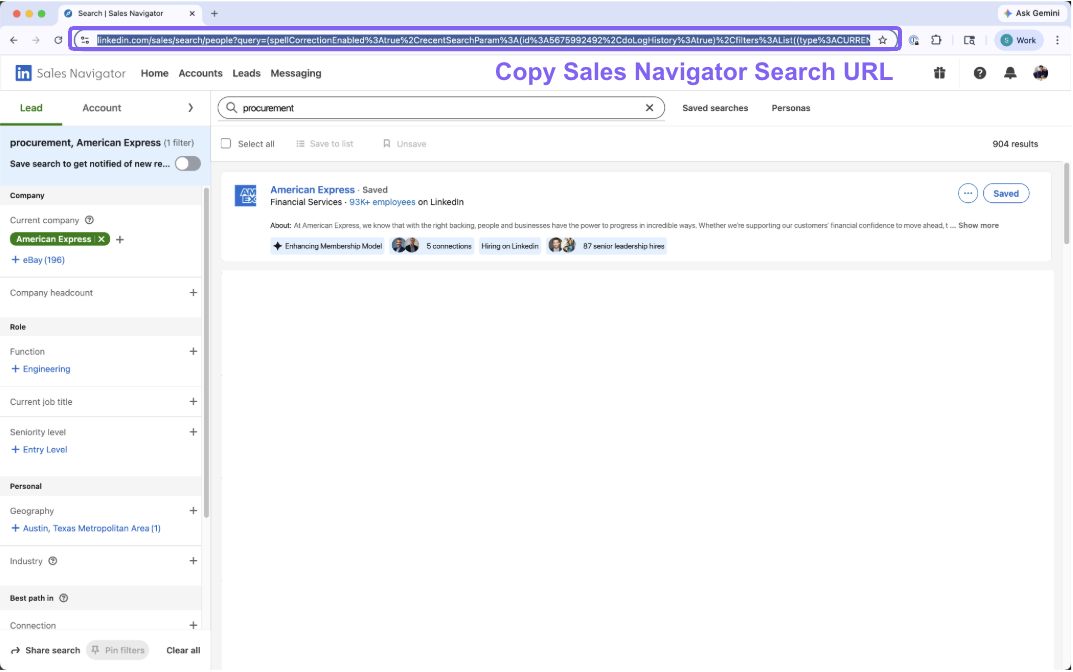
Sales Navigator Search URL — paste the URL from a LinkedIn Sales Navigator search you've already set up. Build the search in Sales Navigator (filters for company, role, geography, etc.), then copy the URL from the address bar.
-
Profile count — how many profiles to pull from that search.
-
Refine criteria & create — an AI chat where you layer additional requirements on top of the Sales Navigator filters. Describe in plain language what really matters — domain expertise, deal-breakers, specific experience — and Cabos uses those during evaluation.
Examples of refinement prompts:
- "Director-level and above, focused on strategic sourcing and vendor management"
- "Senior engineers with hands-on battery experience, not just management"
When you're happy, give the list a name and click Create Candidate List. Cabos pulls the full list in the background — you can leave the page and come back.
You can add multiple candidate lists to one segment. Each list has its own Sales Navigator URL and refinement criteria but shares the segment's interview / outreach configuration.
3. Review the candidate list
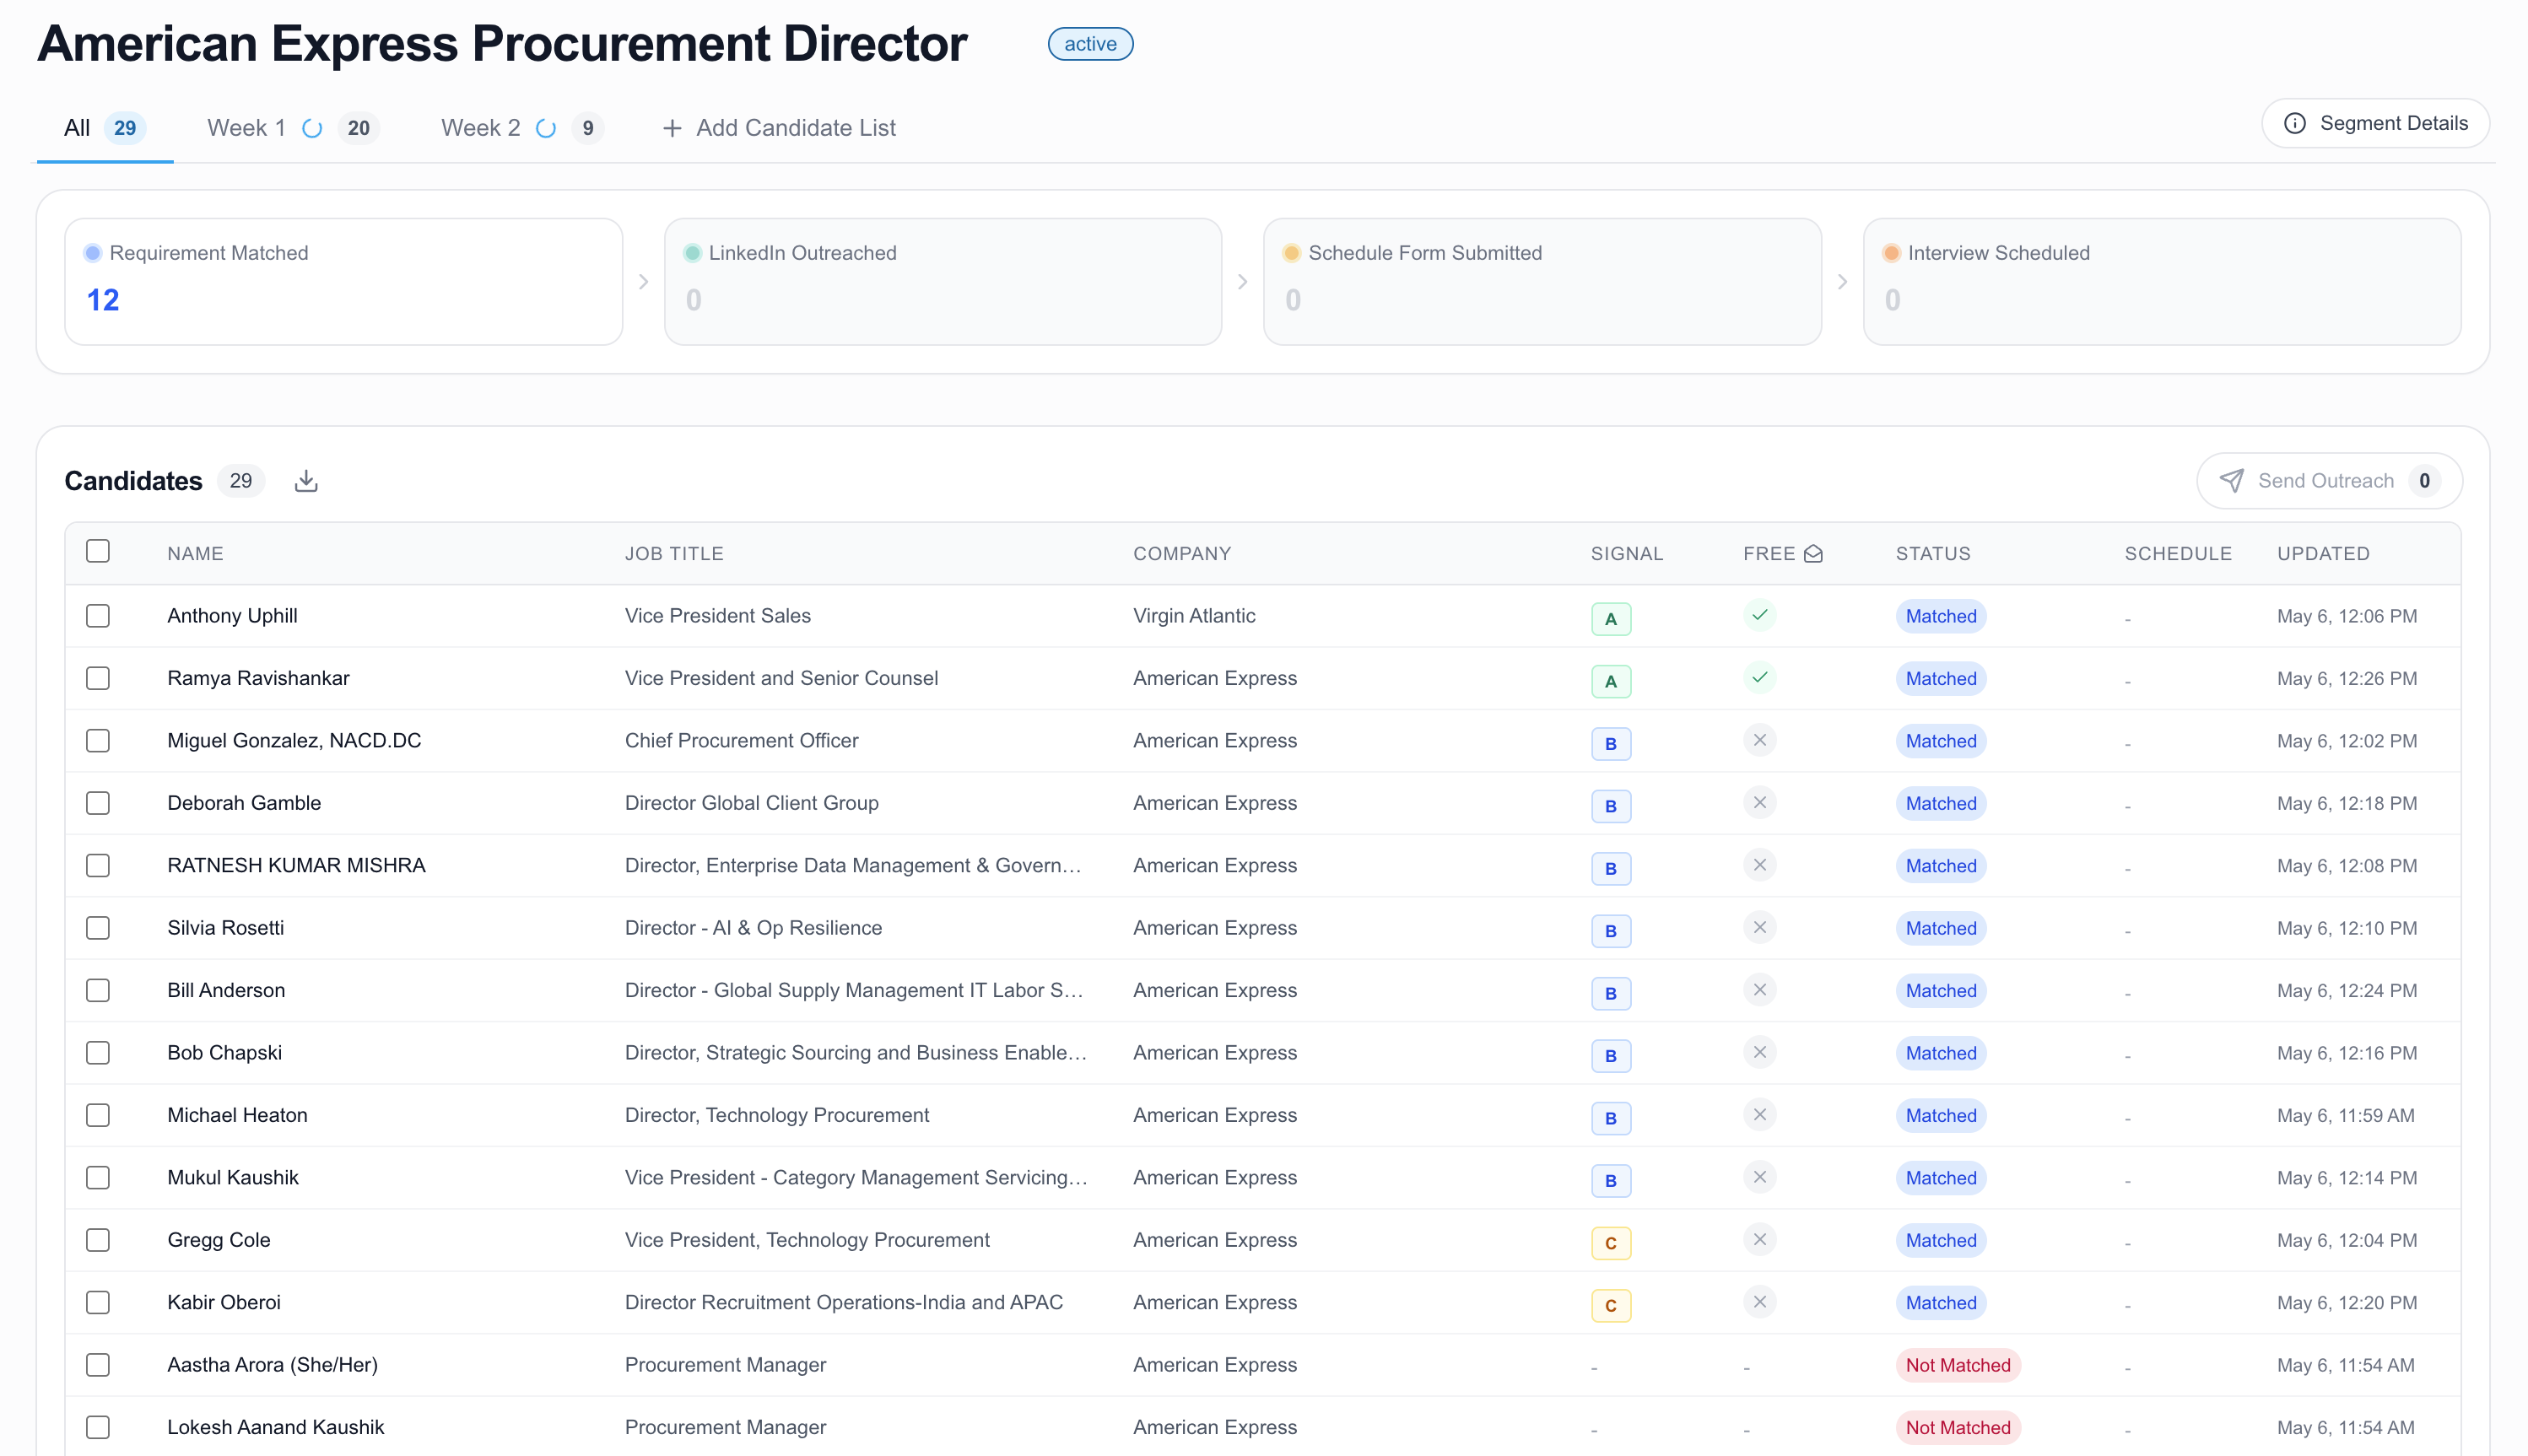
The segment detail page shows the candidates table along with a funnel of pipeline counts (Requirement Matched → LinkedIn Outreached → Schedule Form Submitted → Interview Scheduled).
Tabs at the top let you filter:
- All — every candidate across every list.
- Unassigned — legacy candidates not associated with any list.
- One per candidate list — switch between lists you've added.
For each row you see the profile, current title and company, an evaluation (Cabos's AI-graded match against your filters), profile quality signals, and the candidate's outreach status. Click a row to open the candidate detail drawer, which shows the full profile, evaluation reasoning, and any outreach history.
Use the column header menus to sort and filter. The table paginates 100 rows at a time.
4. Send outreach
- Tick the candidates you want to contact.
- Click Send Outreach.
- In the modal, pick the LinkedIn account to send from (you can connect more on the LinkedIn Accounts page) and the outreach type (Connection Request or InMail).
- Pick a template or compose inline. For InMail, set the subject. Toggle Follow-up if you want a second message.
- Click Send.
Cabos queues the messages and sends them at a safe pace — see LinkedIn Accounts for the per-account daily and weekly caps. Status updates land in the candidate row as messages send, get accepted, or receive replies.
5. Edit segment settings
Open the right-side Segment Details drawer to edit:
- Segment name
- Interview Info
- Attached screener
- Outreach configuration (template, message, follow-up)
- Add a candidate list — open the AI chat to pull in another list of profiles under this segment
Changes apply to candidates added after the edit. Existing candidates keep whatever configuration was active when they entered the segment.